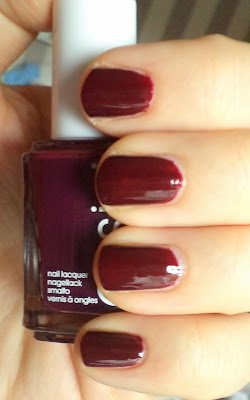
Hello everybody! I'm back today with a NOTD. This is an attempt to do nail art. I saw this design on Cutepolishes 'Ultimate Christmas Guide' video on youtube and I decided to try it. I tried and it didn't turn out that amazing, but I still wanted to share this with you guys.
What you will need for this design:
- Base Coat: I'm using O.P.I.'s Nail Envy Nail Strengthener
- Base Color: Essie's 'Shearling Darling'. You can use whatever color you want, everything will work for this.
- Color for the Ribbon: Models Own 'Champagne'. Again, you can use any color you want for this, but a golden of silver color will look gorgeous.
- Top Coat: I'm using Essie 'No Chips Ahead'.
- Nail art liner brush. An old eyeliner brush will work as well or you can use a tooth pick.
- Tooth Picks
First of all, apply a base coat on all of your nails. This will protect your nails and prevent them from getting yellow. Then apply two coats of your base color. I'm using Essie's 'Shearling Darling'. I LOVE this color. It's a dark oxblood color. PERFECT for fall and winter. It's an amazing formulation, perfectly opaque in two coats.
With the nail art brush and your color for the ribbon, draw a vertical line on your nail. Beginning from the cuticle, towards the beginning of the nail. Make sure the line is not too close to the side of the nail, you'll need room for the ribbon!
After that, apply a horizontal line. Again, make sure you have enough room for the ribbon! I made that mistake and I didn't always have room enough for the rest of the ribbon.
With your tooth pick, draw the rest of the bow.
This is actually the only nail that really turned out to be good, haha. I think I worked a bit too fast and my bows didn't turn out that great. Take your time while doing this nail look!
This is the completed look. I hope you liked this 'tutorial' and that you'll give it a try.
Merry Christmas everyone!
xx,
Astrid
Nail of the Day: Christmas Eve Edition: Wrapped Gift
Subscribe to:
Post Comments (Atom)


So pretty:) I once tried this and it's not as easy as it looks:) Drawing the curves is always problematic:)
ReplyDeleteYes indeed, the curves were the hardest part! :)
Delete